

总结下 Mac OS 上 iTerm2 + Oh My Zsh 的配置 以防又要到处找
1. 安装 iTerm2
安装包安装
下载地址:https://www.iterm2.com/downloads.html
下载的是压缩文件,解压后是执行程序文件,你可以直接双击,或者直接将它拖到 Applications 目录下。
推荐使用 Homebrew (mac 神器,如果不清楚请自行搜索)进行安装:
$ brew cask install iterm22. 配置 Oh My Zsh
因为墙的缘故 安装都很慢,如果本机有代理软件的化,可以使用如下代码进行代理!如果没有代理可忽略这一步
export all_proxy=socks5://127.0.0.1:1080Oh My Zsh 是对主题的进一步扩展,地址:https://github.com/robbyrussell/oh-my-zsh
一键安装:
$ sh -c "$(curl -fsSL https://raw.github.com/robbyrussell/oh-my-zsh/master/tools/install.sh)"安装好之后,需要把 Zsh 设置为当前用户的默认 Shell(这样新建标签的时候才会使用 Zsh):
$ chsh -s /bin/zsh然后,我们编辑 .zshrc文件
vim ~/.zshrc将主题配置修改为
ZSH_THEME="agnoster"agnoster是比较常用的 zsh 主题之一,你可以挑选你喜欢的主题
zsh 主题列表:https://github.com/robbyrussell/oh-my-zsh/wiki/themes
3. 配置 Meslo 字体
使用上面的主题,需要 Meslo 字体支持,要不然会出现乱码的情况
字体下载地址:Meslo LG M Regular for Powerline.ttf
下载好之后,直接双击安装即可。
然后打开 iTerm2,打开 Preferences 配置界面,然后Profiles -> Text -> Font -> Chanage Font,选择 Meslo LG M Regular for Powerline 字体。
另外,VS Code 的终端字体,也可以进行配置,打开 VS Code,打开用户配置,搜索fontFamily,然后将右边的配置增加
"terminal.integrated.fontFamily": "Meslo LG M for Powerline"4. 声明高亮
方法1
使用 Homebrew 安装:
$ brew install zsh-syntax-highlighting安装成功之后
source ~/.zshrc在最后一行增加下面配置:
source /usr/local/share/zsh-syntax-highlighting/zsh-syntax-highlighting.zsh方法2
使用 git 安装
cd ~/.oh-my-zsh/custom/plugins/
git clone https://github.com/zsh-users/zsh-syntax-highlighting.git 安装成功之后在.zshrc最后一行增加下面配置:
source ~/.oh-my-zsh/custom/plugins/zsh-syntax-highlighting/zsh-syntax-highlighting.zsh5. 自动建议填充
这个功能是非常实用的,可以方便我们快速的敲命令。
cd ~/.oh-my-zsh/custom/plugins/
git clone https://github.com/zsh-users/zsh-autosuggestions.git
然后编辑
vim ~/.zshrc找到plugins配置,增加zsh-autosuggestions插件。
plugins=(
    git
    zsh-syntax-highlighting
    zsh-autosuggestions
)
注:上面声明高亮,如果配置不生效的话,在plugins配置,再增加zsh-syntax-highlighting插件试试。
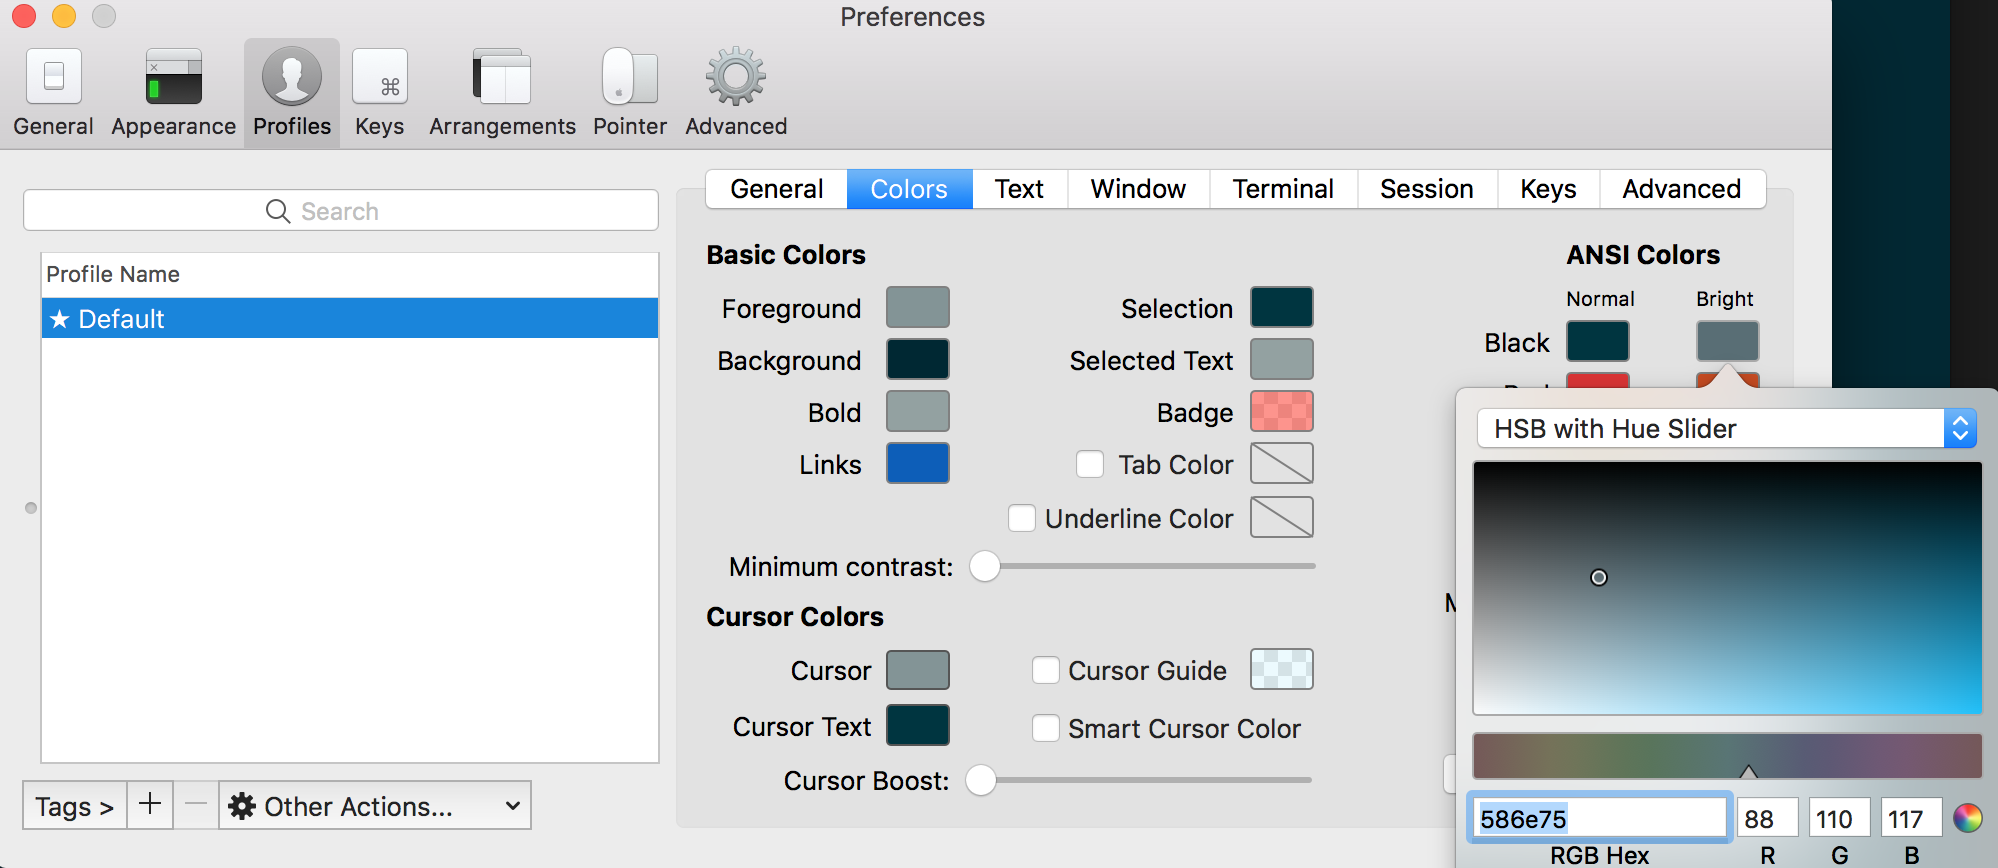
有时候因为自动填充的颜色和背景颜色很相似,以至于自动填充没有效果,我们可以手动更改下自动填充的颜色配置例如:586e75,示例:
6. 左右键跳转
主要是按住option + → or ←键,在命令的开始和结尾跳转切换,原本是不生效的,需要手动开启下。
打开 iTerm2,打开 Preferences 配置界面,然后Profiles → Keys → Load Preset... → Natural Text Editing,就可以了。
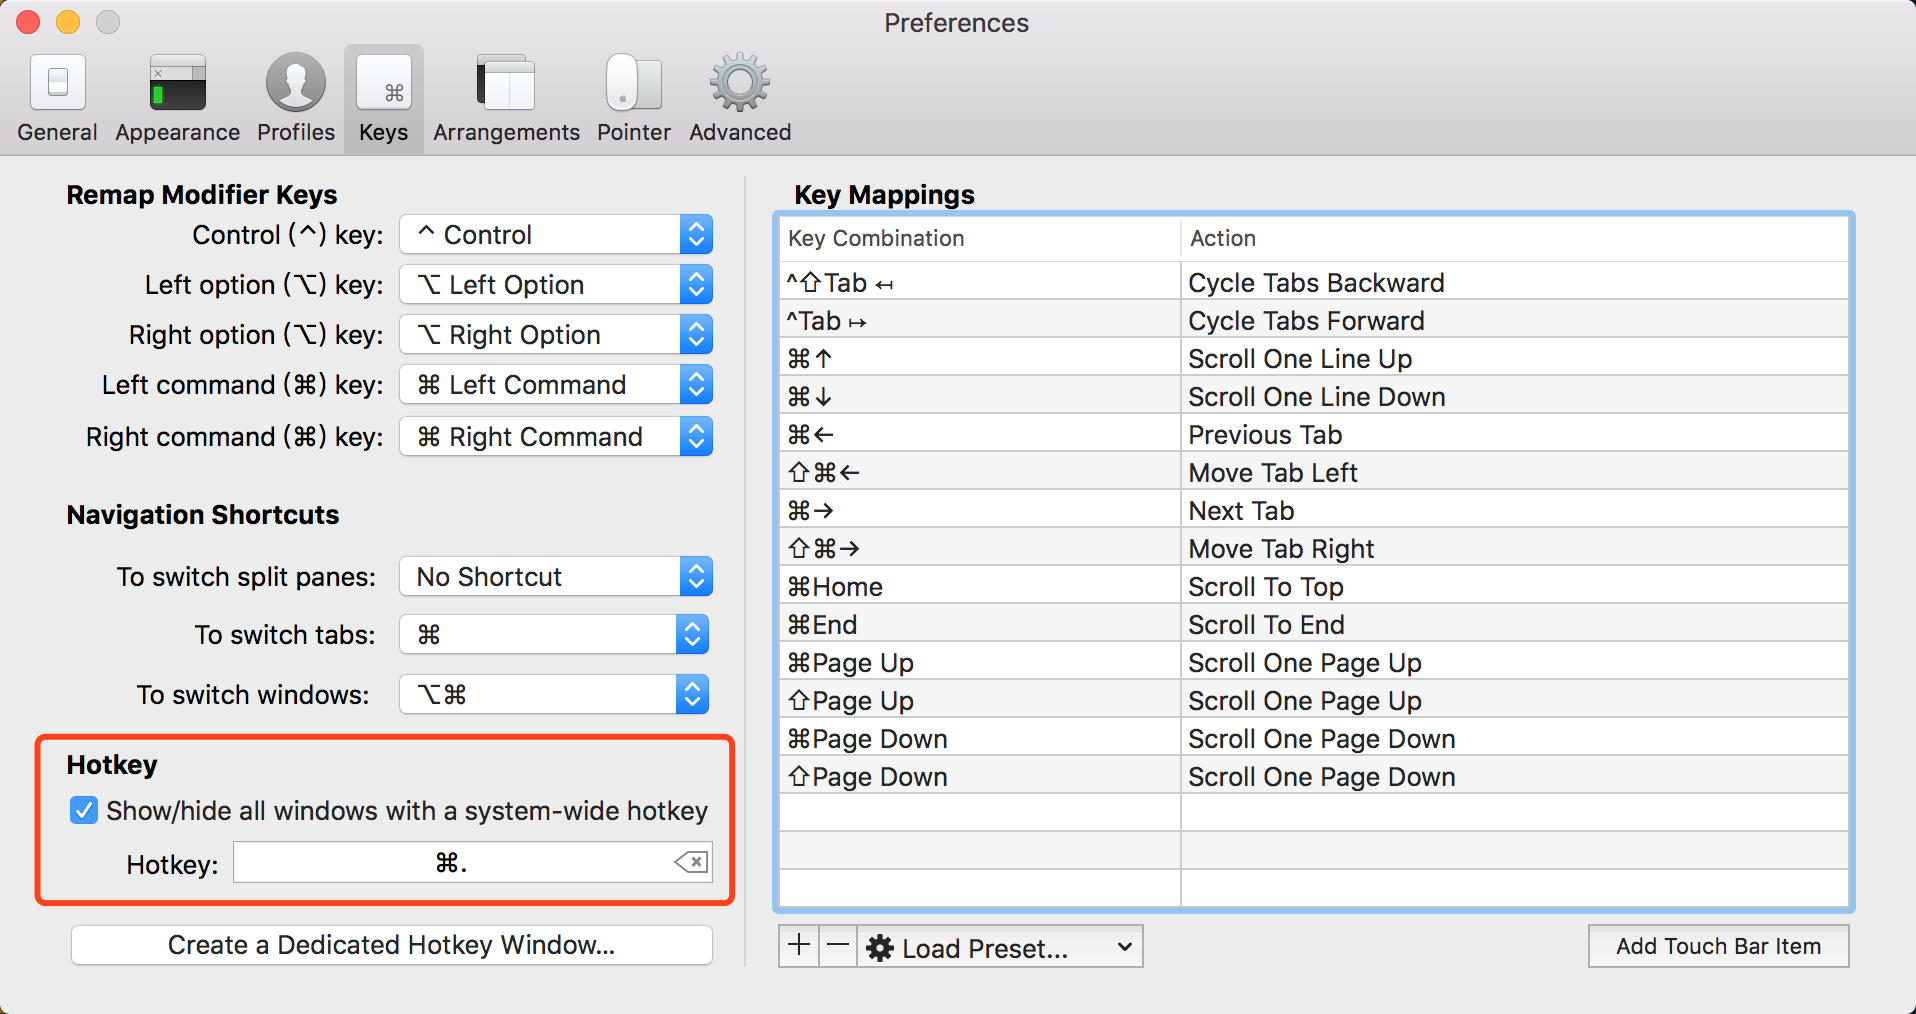
7. iTerm2 快速隐藏和显示
这个功能也非常使用,就是通过快捷键,可以快速的隐藏和打开 iTerm2,示例配置(Commond + .)
8. iTerm2 隐藏用户名和主机名
假如你用的主题是 agnoster,修改方法是进入 oh-my-zsh/themes/然后
vi agnoster.zsh-theme编辑主题配置文件,找到如下代码:
# Context: user@hostname (who am I and where am I)
prompt_context() {
  if [[ "$USER" != "$DEFAULT_USER" || -n "$SSH_CLIENT" ]]; then
   # 修改如下代码,@Mac可以你自己定义 也可以直接注释,这样什么都不会显示了
   # prompt_segment black default "%(!.%{%F{yellow}%}.)$USER@%m"
   prompt_segment black default "%(!.%{%F{yellow}%}.)$USER@Mac"
  fi
}cd ~/.oh-my-zsh
git status
git stash
upgrade_oh_my_zsh
git stash popgit stash 讲解请见这里
9. iTerm2 配置代理
vim ~/.zshrc增加下面配置(按实际使用的协议及端口):
# proxy list
alias proxy='export all_proxy=socks5://127.0.0.1:1080'
alias unproxy='unset all_proxy'
iTerm2 需要新建标签页,才有效果:
当需要代理时 先运行proxy不需要时再运行unproxy
$ proxy
$ curl myip.ipip.net
当前 IP:xxx.xxx.xxx.xxx 来自:xx

$ unproxy
$ curl myip.ipip.net
当前 IP:xxx.xxx.xxx.xxx 来自:xx
10. iTerm2 快捷命令
快捷命令说明:
| 命令 | 说明 |
|---|---|
| command + t | 新建标签 |
| command + w | 关闭标签 |
| command + 数字 command + 左右方向键 | 切换标签 |
| command + enter | 切换全屏 |
| command + f | 查找 |
| command + d | 垂直分屏 |
| command + shift + d | 水平分屏 |
| command + option + 方向键 command + [ 或 command + ] | 切换屏幕 |
| command + ; | 查看历史命令 |
| command + shift + h | 查看剪贴板历史 |
| ctrl + u | 清除当前行 |
| ctrl + l | 清屏 |
| ctrl + a | 到行首 |
| ctrl + e | 到行尾 |
| ctrl + f/b | 前进后退 |
| ctrl + p | 上一条命令 |
| ctrl + r | 搜索命令历史 |
我来试试看
分享很棒,不过开启跳转那个没啥必要,ctrl+a/e 就可以做到,可能作者没怎么用过 linux
不过顺便问一下自动获取头像这个是怎么搞的,拿的哪里的头像,很帅
头像是根据填写邮箱获取的 Gravatar 头像,如果是 QQ 邮箱 会优先获取 QQ 头像
帅的